Hi there
We know you’re one of us — people who care about the small details. And today we are looking at something very specific, something we often find ourselves revisiting again and again in projects: how a construction junction is actually resolved when you start working with wood paneling.
It sounds very technical, and in a way it is, but once you are deep into a project you realise how much these small decisions start to shape the overall feeling of a space.
Next time you include wood paneling in one of your projects, for example around a pillar as we show here, but also in many other situations, you will have more tools to decide how corners come together and what kind of character you want that junction to have.
Sometimes it needs to disappear completely into the background. Sometimes it becomes almost the most interesting part of the whole composition. And sometimes it is something in between, something quiet but intentional that you only really notice when you stop and look closely.
Because as we always say, there are no fixed rules here. Just different ways of solving the same moment, depending on what the project needs to be.
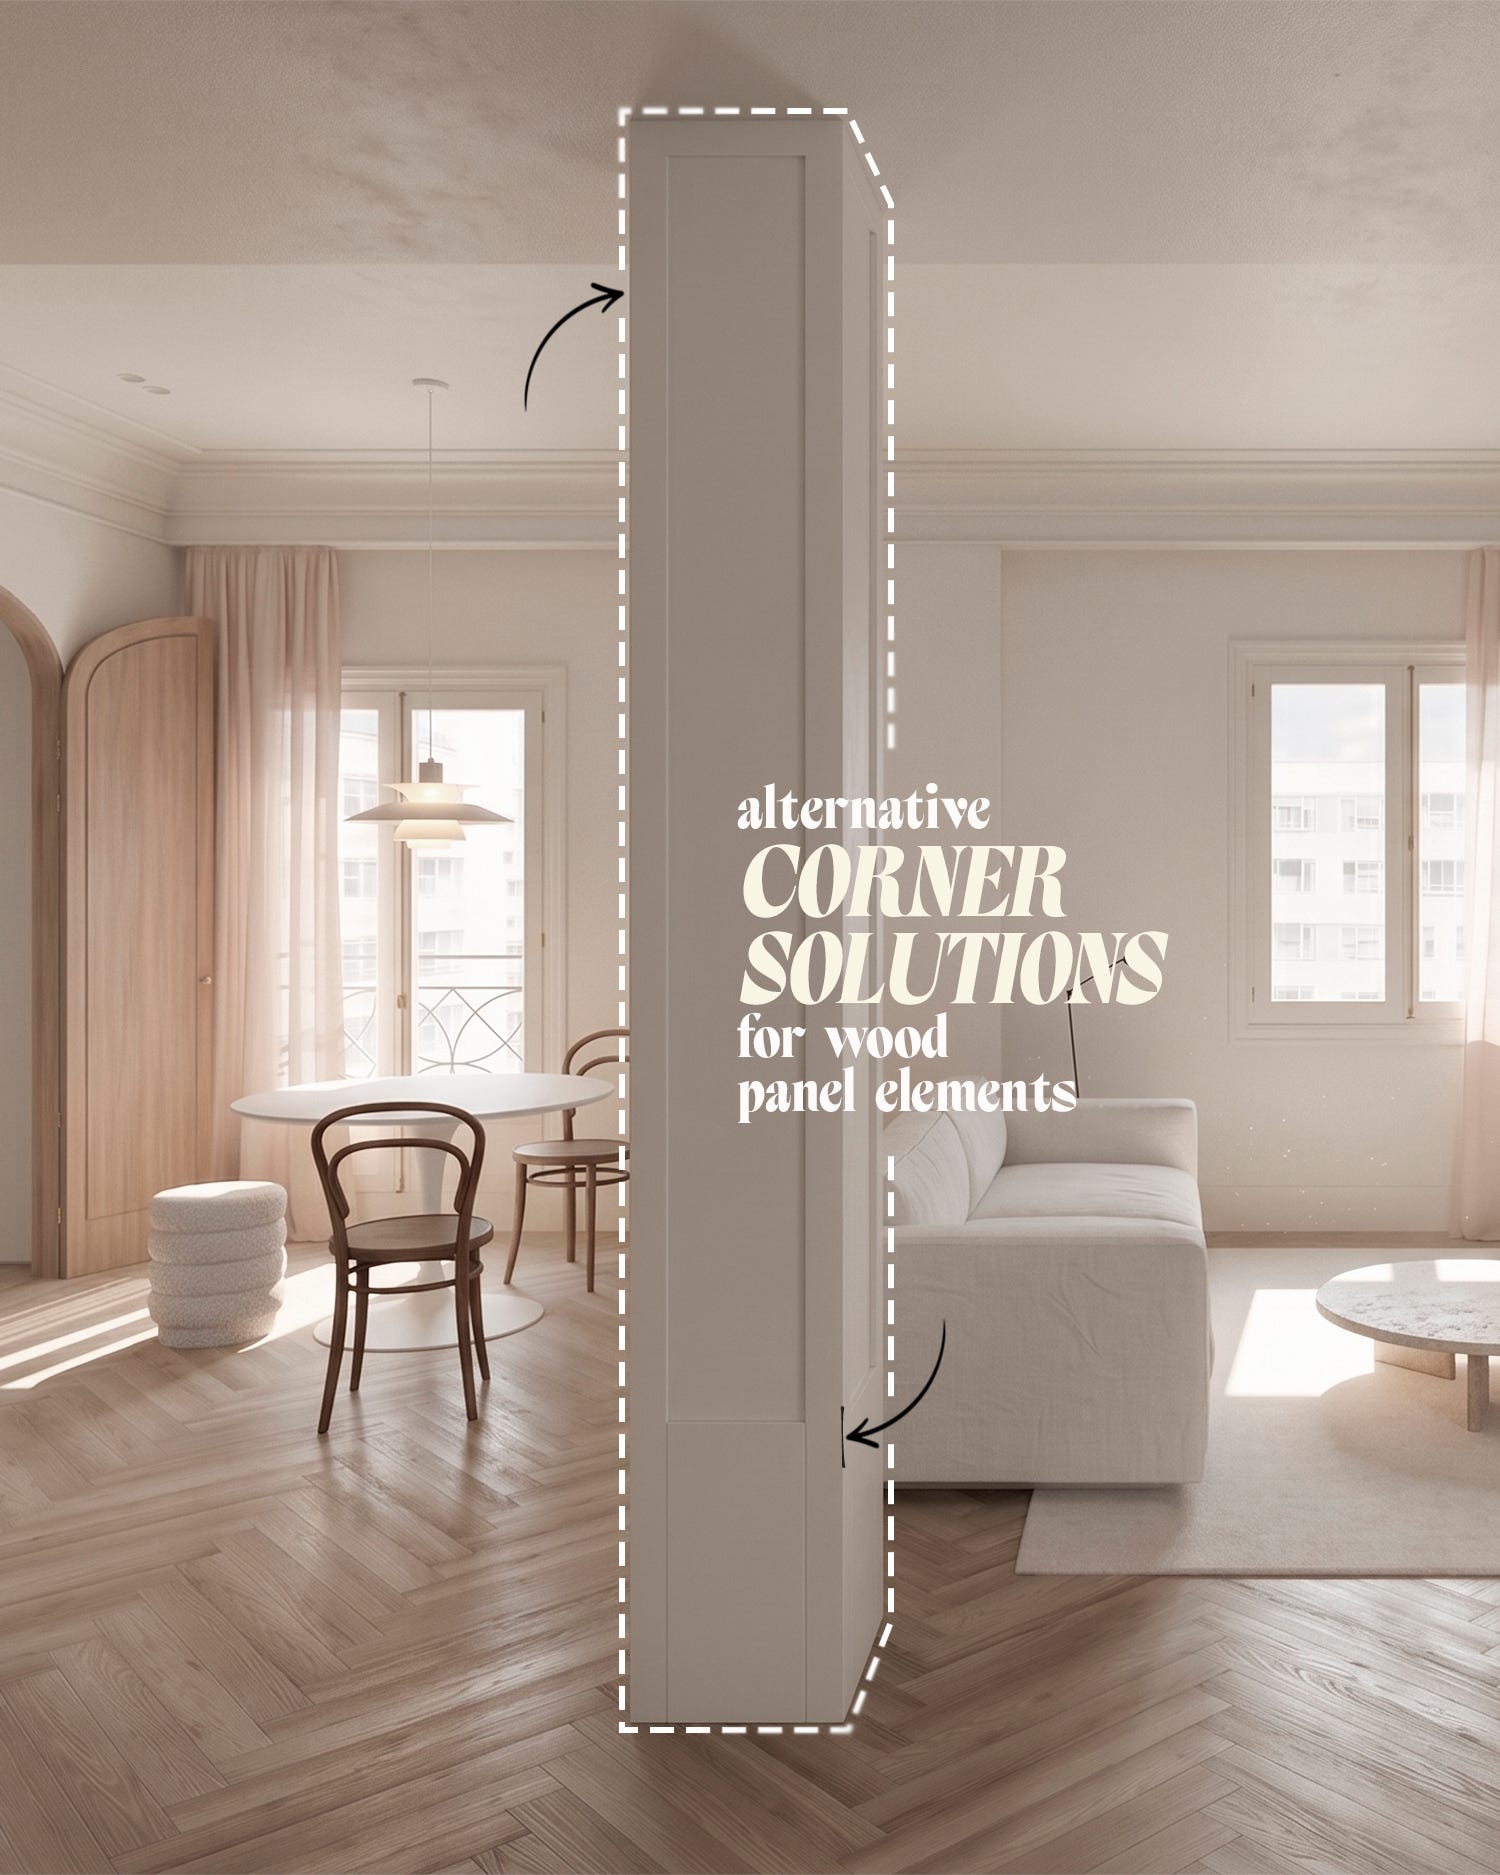
In the cover image you can see a real example of this. It is a wood paneling detail we designed for a pillar in one of our projects in Valencia, Spain, where we used a miter joint for the corners.
In this case we were looking for rhythm and simplicity at the same time. It was the only paneled element in the space, so it needed enough depth to give it presence, but without feeling disconnected from the rest of the interior elements, such as doors or skirting boards.
That is why we chose clean and simple corner solutions, ones that support the design of the faces rather than competing with them.
What this really shows is that this post is not about replacing one solution with another or suggesting that miter joints should be avoided. They are widely used for a reason. The point is not to “do something different” just for the sake of it, but to understand that sometimes the obvious solution is not always the most appropriate one.
And when that happens, having more options changes everything.
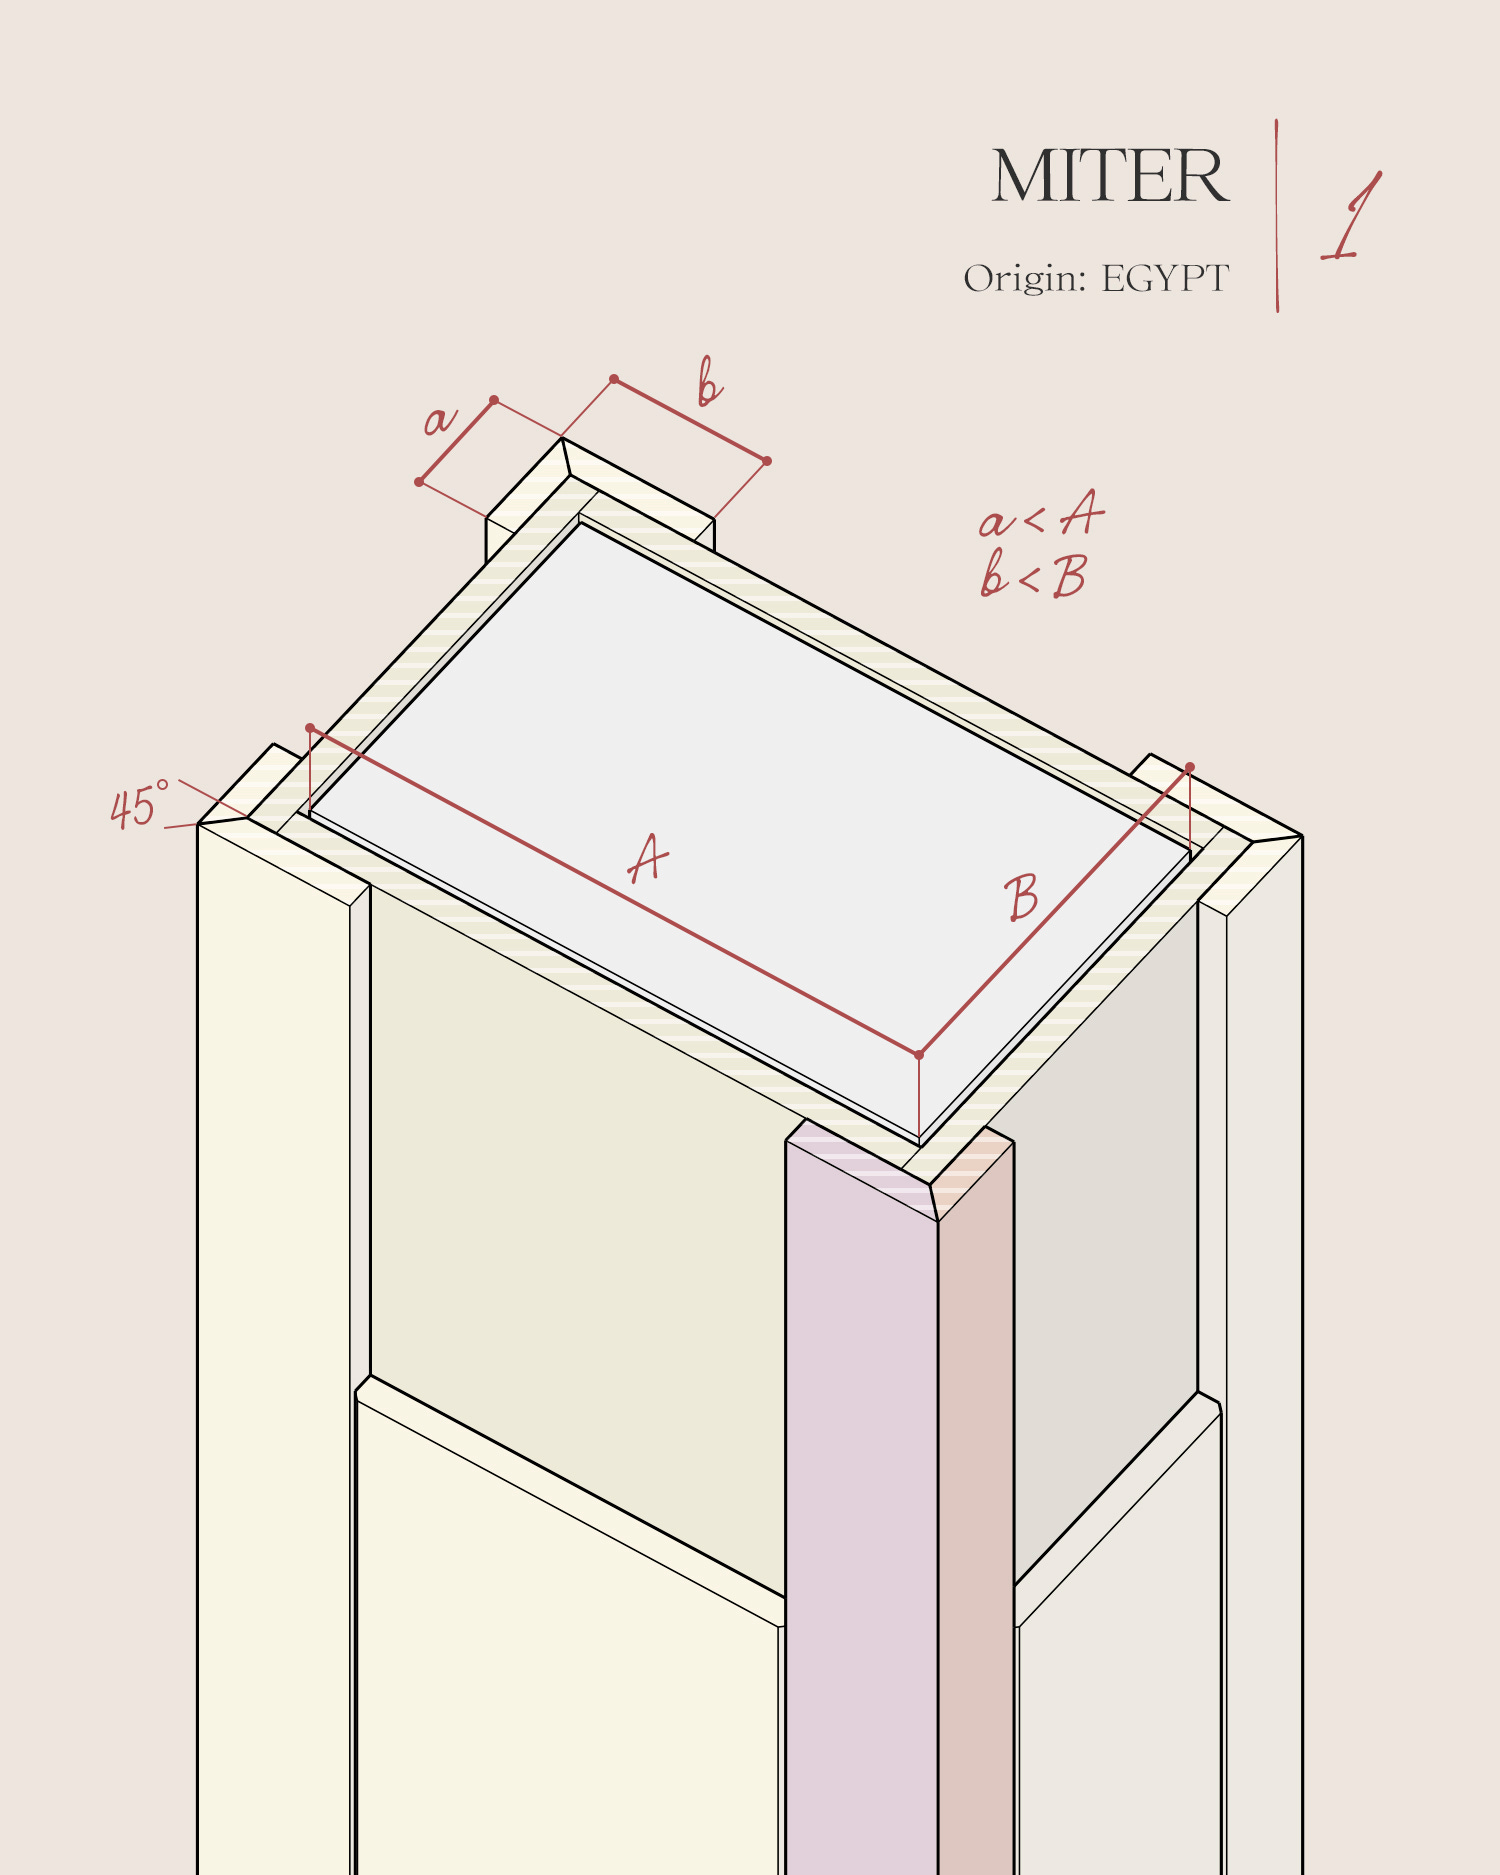
1 Miter joint
A 45-degree cut is probably the most familiar and clean solution for a corner like this. It is precise, seamless, and often the first reference point when thinking about how two surfaces should meet. As mentioned earlier, it is also the one we used in the Valencia project.
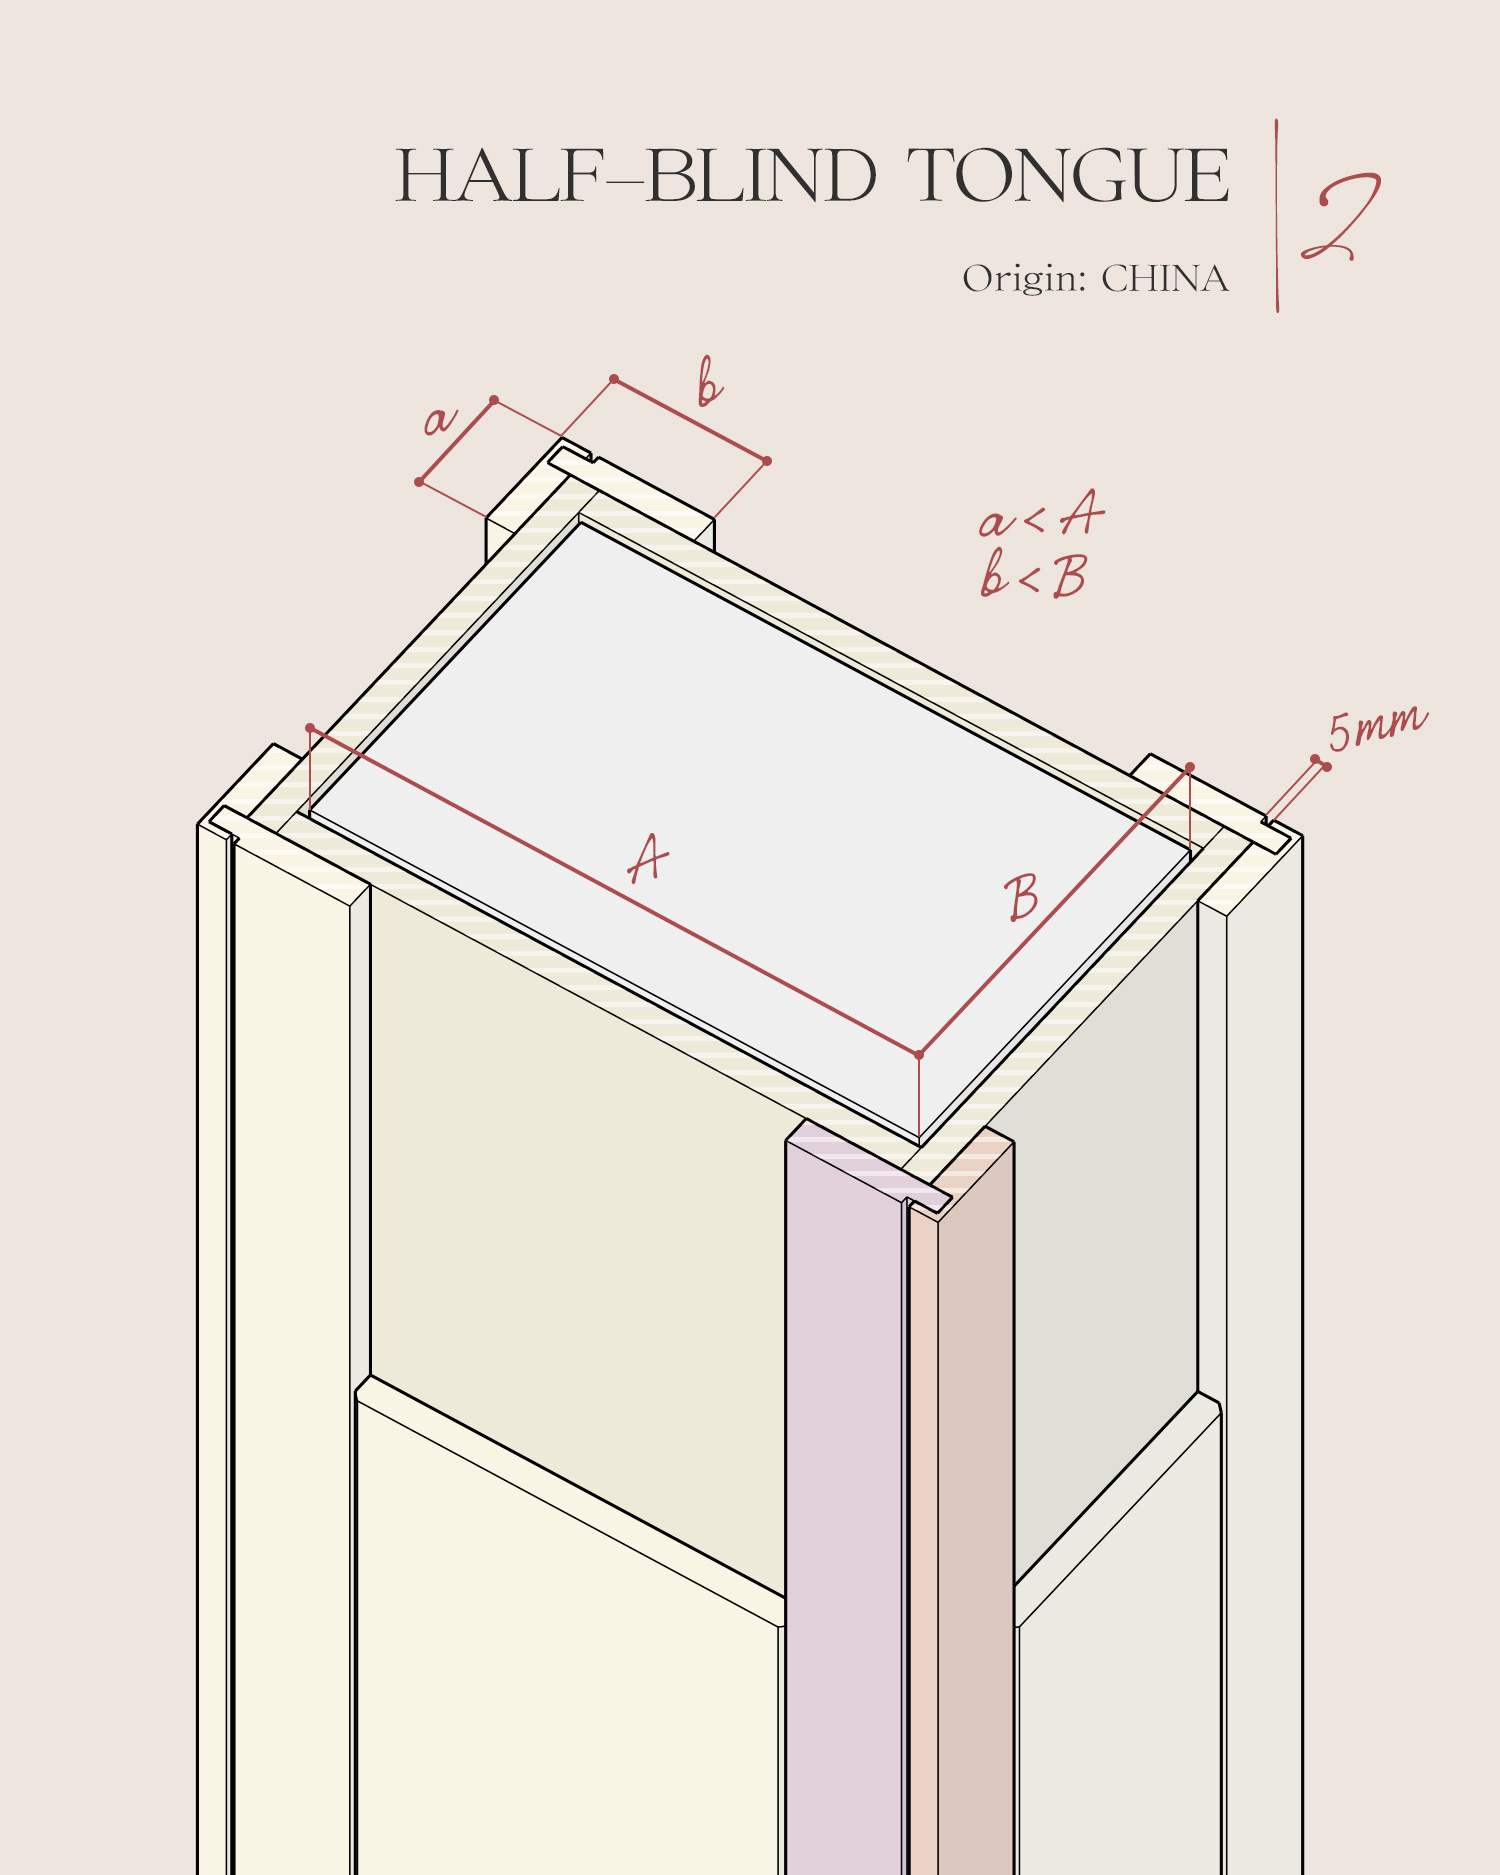
2 Half-blind tongue joint
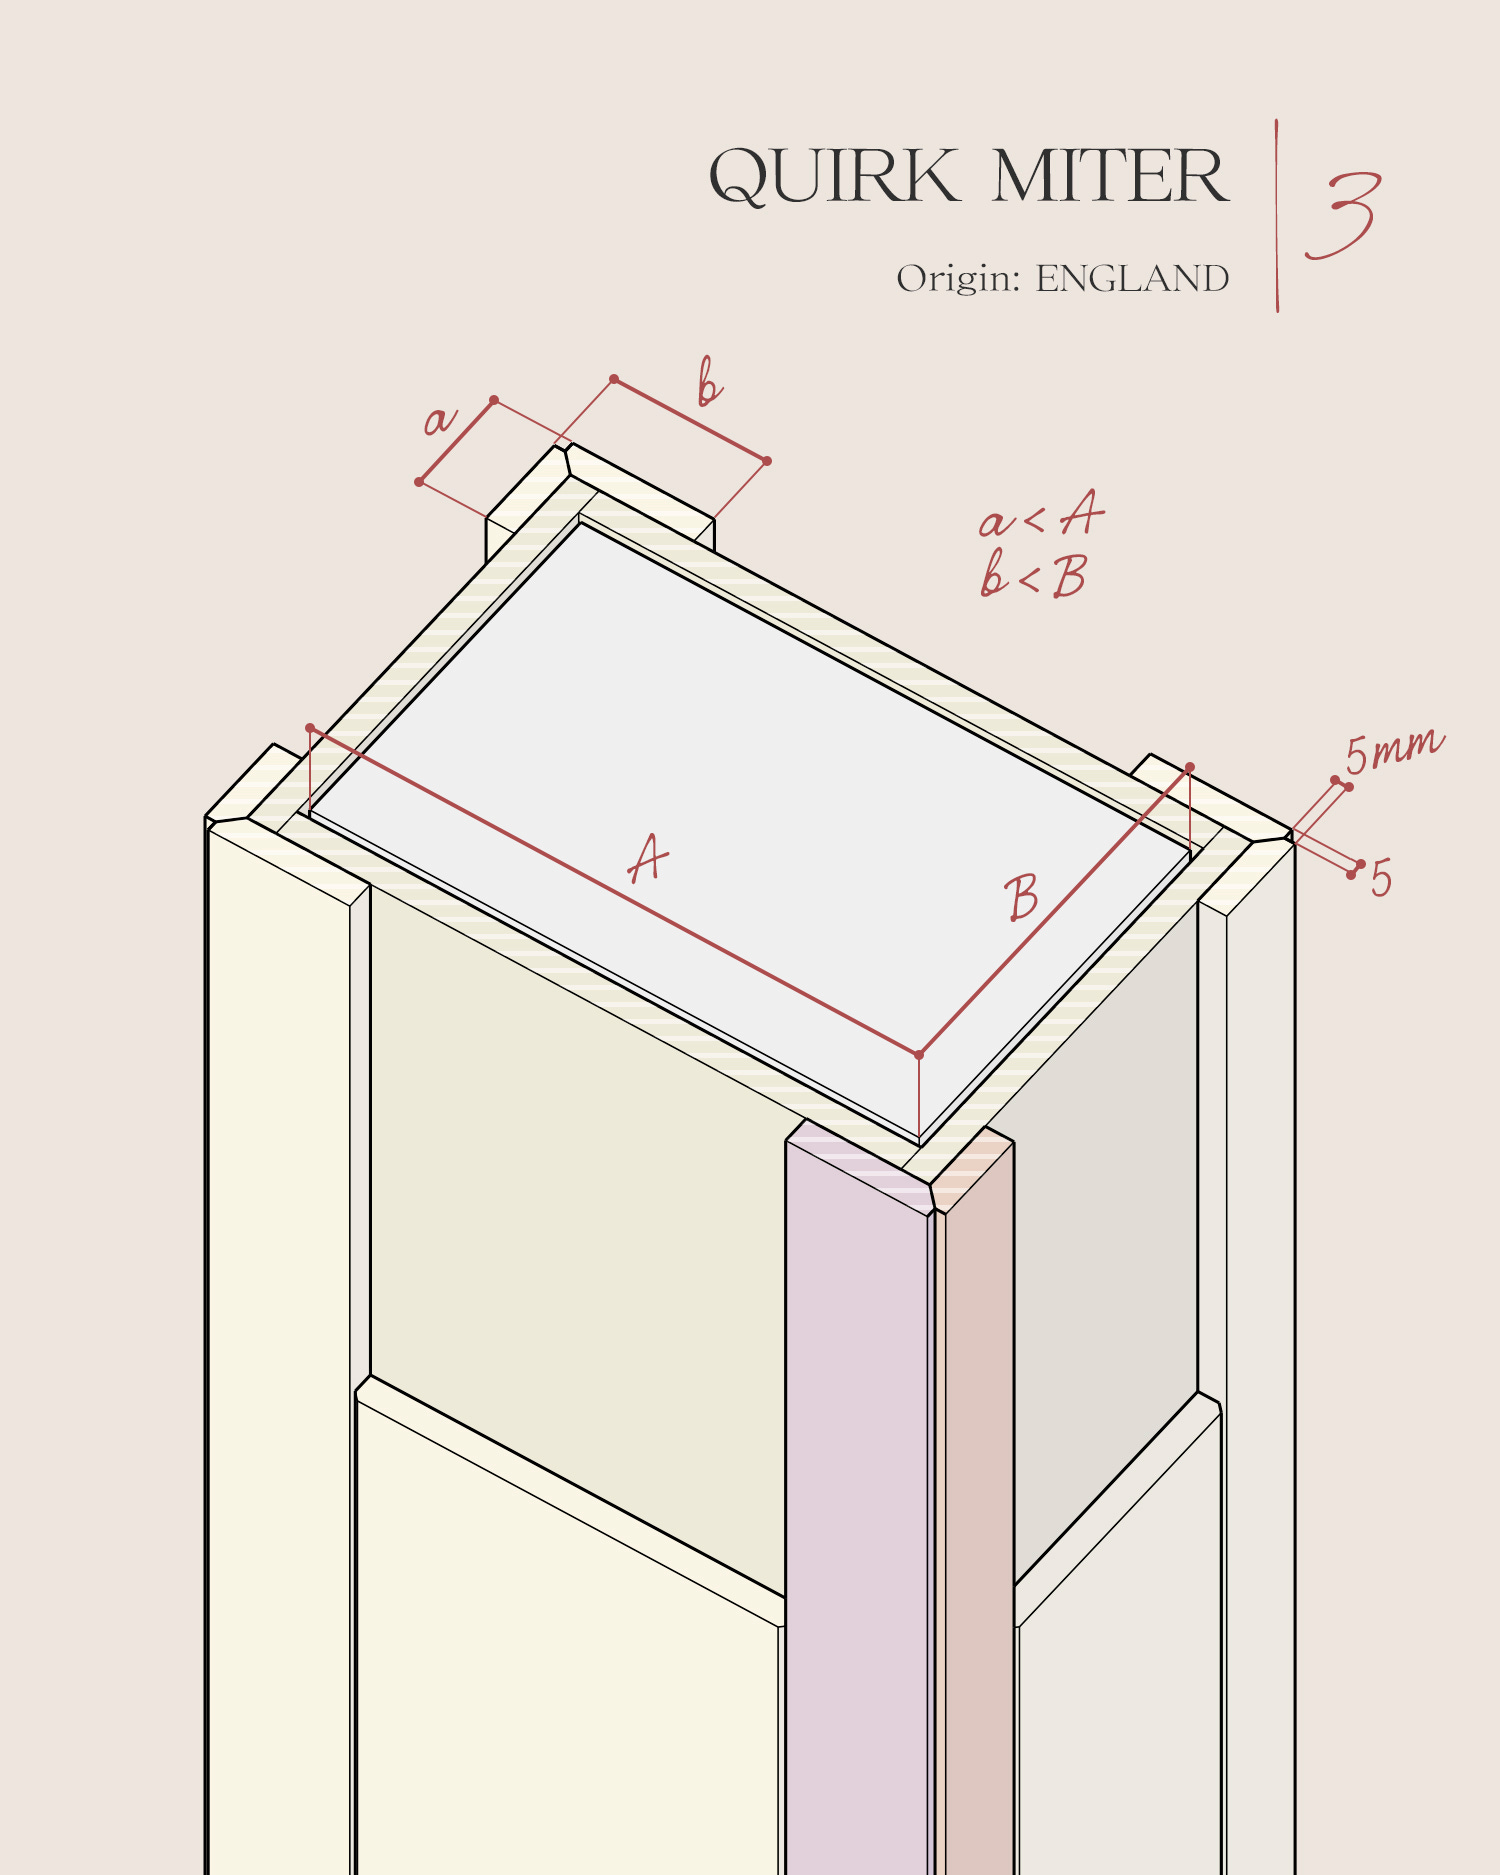
This option works particularly well when you want the junction to read differently on each adjacent face. On one side it appears as a clean meeting, while on the other it becomes a visible edge with more intention. It is not just a simple exposed end. Instead, the two pieces come together with a subtle reveal, a quiet shadow line that makes the corner feel more considered and slightly more pronounced.
3 Quirk miter
The more refined sister of the standard miter joint. It keeps the same clean geometry, but introduces a subtle shadow line running along the junction. It is a small shift, but enough to change the reading of the corner completely, adding depth without losing simplicity.